30 September 2011

{this moment}


Joining Soulemama's {this moment} - A Friday ritual. A single photo - no words - capturing a moment from the week. A simple, special, extraordinary moment. A moment I want to pause, savor and remember.
If you're inspired to do the same, leave a link to your 'moment' in the comments for all to find and see.

Autumn


27 September 2011

Make a Terrarium


 Last year, we brought Kaia's faerie garden inside for the Winter for her to enjoy and care for. This year, with the addition of new plants, it will need to stay outside under the snow to do well. By Spring, her garden wasn't looking so hot anyway. So instead, we decided to make a terrarium for her to keep through the snowy season. We looked up a whole bunch of information and tutorials, and this is how we ended up making ours. 

You will need:
•A Watertight Container With Lid
•Gravel
•Activated Carbon (Or Activated Charcoal)
•Sand (Optional)
Soil (Or Other Substrate)
 •Mosses (We Also Used Lichens)
•Decoration (Also Optional)


We found our glass containers at the craft store. You could use a corked jar, a food canister, or simply use a canning jar. Anything that will hold water and can be closed will work. Start by putting in a good layer of gravel, about ½ to 1 inch deep. This will provide drainage and help keep your plants from being overwatered. Eskaba came to check what Kaia was doing and find out if she can eat it. The chicken is not necessary for the successful building of your terrarium.


Add a light layer of activated carbon to the top of the gravel. Put in enough to spread over the gravel, but it doesn't have to completely cover it. This terrarium got a little extra dose because I was trying to take a picture, and Kaia dumped it all in. Woops! We found our activated carbon at the pet store, where it is normally used for fish filters. It removes impurities from the water, and ours needed to be rinsed before being used. You should wash your hands thoroughly after handling it, which is why I put it in little cups for Kaia to use. We also spread a layer of sand over the top of the carbon, for more filtration and drainage, but I saw many examples which did not use any.


Next, put in a layer of soil, or whatever substrate you chose. I like the look of soil, but moss does not really need it. Mosses absorb all their nutrients and water through their leaves, not through their roots, which are simply used to anchor the plant. You could instead use stone, woodchips, or even brick. Pat it down gently, then begin adding your mosses, (and lichens if you have them.)


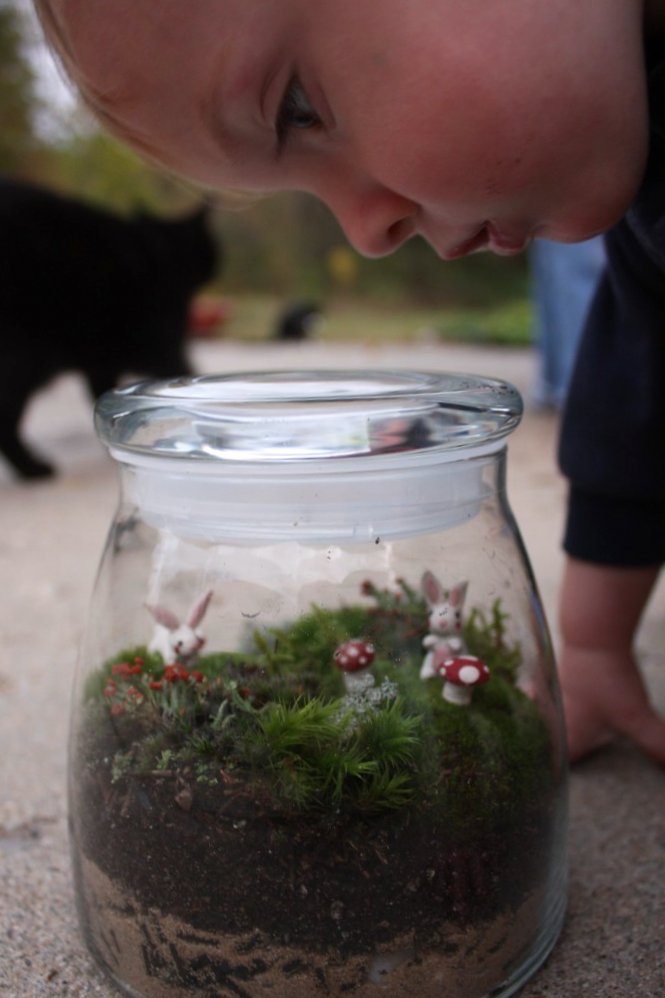
We collected our mosses and lichens out in the woods, and if you do, try to take note of what kind of light your plants are growing in. Different types of mosses have different tolerances to sun. Most prefer a dappled shade, like that of the woods, but if you are collecting yours under full sun, it may need more light than other types. Once you've arranged your plants as you like, add your decorations. I made a few simple things out of polymer clay with toothpick stakes baked in. Kaia wanted a couple bunnies and a few mushrooms. I've seen other people use charms, beads, rocks, little figurines or toys, etc. Be creative, and use what you like!


Put your lid on...


 And enjoy! Little Katalin loves it as much as her big sister.


Keep your lid on, moss and lichens will dry out very quickly. Your terrarium will fog up and evaporate in a natural rhythm, but if you believe yours is too wet, leave the lid off for 15 minutes or so. You will only need to water it once every two or 3 months. Give it one or two light sprays with a spray bottle, some people use an eye dropper. Take care not to overwater, most plants can much easier survive too little water than too much, so if you are not sure, err on the side of less. If it seems to be drying out, you can always add a little more.


Kaia's terrarium was the second we made, the day before we made one for a friend of Kaia's. We had quite short notice to her Birthday party, as her friend realized that, while she'd invited Kaia, she'd forgotten to let us know the actual date, and gave us a call that morning. This was a sweet little gift to whip up in a hurry, and it, along with a packet of polymer clays for her to continue creating on her own, was very well received by an 11 year old Birthday girl. I made a little fawn for her terrarium, and a sprinkling of mushrooms as well.


Unless, as I pointed out earlier, you collected your moss under full sun, you will want to find a place to keep your terrarium in indirect or filtered sunlight. It does need sun, but too much will fry it quickly.

I would love to see any terrariums you create! Kaia already wants to make more, and I already picked up a few more glass containers. I suspect that, in addition to making a few as Christmas gifts, (because, yes, I am working on those already, oh my!) that we will also be adding to our own collection. I love them as much as the girls, they are just so sweet.

23 September 2011

Twig and Maple Seed Dragonflies


I've seen these a few places before, but I really fell in love with the sparkly wings on those that were made at Twig and Toadstool, and knew Kaia would adore them. It was too late in the year for us when they posted theirs last Fall, and no whirlygigs, (or whirlybirds, helicopters, maple keys, or maple seeds!) were to be found, so this project was a long time coming. This year, we were not going to miss out!


You will need some maple seeds, paint and paintbrush, hot glue, twigs, small or seed beads, and either glitter glue, or craft glue and glitter. Cut the wings off of all the seeds.


Match them up into sets, you will need four wings per dragonfly. Kaia had a lot of fun matching them up, then she painted both sides of each wing. She wanted a rainbow of dragonflies, which is not terribly shocking, as she wants a rainbow of pretty much everything. :)


Then she painted the twigs, and, if I do say so myself, I love the way they came out. I showed her how to make stripes on a spare stick, and then she went to town with stripes, spots, and blotches.


We did not have every colour of glitter glue, nor did we have every colour of glitter, so we did a combination. The glitter definitely came out shinier, but they are all pretty. Kaia painted the red and orange wings with glitter glue, and the rest I covered with a coat of Mod Podge (you could simply use craft glue, as well,) before Kaia dumped on the glitter. I was able to do all four wings of each colour at the same time by first putting a dusting of sparkles on my "glitter dump sheet", coating both sides of all wings in Mod Podge, and setting them on the layer of glitter, which kept them from sticking to the sheet as I finished gluing up the others. Then Kaia, ever so liberally, covered them in sparkles. I gave them a little toss in the sparkles before taking them out and funneling the glitter back into its tube.


Lastly, simply hot glue the wings to the twig bodies, and hot glue the beads in place as eyes. You have cute little dragonflies!


Here are all of ours.


We tied strings around them and hung them from the lamp over our dining table.


{this moment}


Joining Soulemama's {this moment} - A Friday ritual. A single photo - no words - capturing a moment from the week. A simple, special, extraordinary moment. A moment I want to pause, savor and remember.
If you're inspired to do the same, leave a link to your 'moment' in the comments for all to find and see.

20 September 2011

Our Fairy Garden: A Tour


Hello! And welcome to our faerie garden. Kaia and I have had so much fun working on it together these last couple Summers, it has been such a pleasure to bring to life what her imagination sees. Our little garden has gotten bigger and bigger, and developed far in excess of what I expected when we began. Next year, she will be 4, and I am sure she will have plans that put our faerie garden out of a pot and into a big garden patch. She's certainly had enough so far! I love the way she announces to me what she feels the faeries need now, and the challenge of working together to create them. We've made almost every single item in our garden together, and most of the plants we collected on hikes and walks, or transplanted from the gardens around our home.


In yesterdays post I talked about making our garden together, and Kaia's large part in it. There are many pictures of the process, and Kaia working on it, and the individual posts linked at the bottom of this one show you what things specifically Kaia made and / or contributed to, and may give you some ideas on how to deeply involve a very young child on a project such as this. I have tutorials up for a number of the items in our garden.


Today, though, I simply want to present you with the photos. Come have a look around! Our garden has been a labour of love, becoming a living, ever growing, and changing project for us.


Walk the path up to the little house...


Approach the doorway, and take a look inside...


You will find a mossy bed to rest your head...


Come have a seat under the sassafras tree and have a bite to eat...


Or sit on the bench to gaze at the pond...


Or perhaps you would like to pull up a log and enjoy the cozy campfire?


Have a look around the gardens. The British Soldiers lichen make perfect faerie sized flowers. Three little blue eggs wait to hatch in the tree...


Take a walk to the stream...


And swing out above the waters...


Or cross the little bark bridge to visit the well. Do you have a wish?


What are the faeries growing in their garden? Lettuce, cabbages, carrots, and radish.


Come watch the birds play in their bath, the lantern will light your path when light begins to fail...


Here comes a faerie! Up the rope ladder...


Mama sweeps while baby sleeps, shhh...


Papa hoes the garden, and harvests the crops...


Chores done, it is time for a relaxing break. Kaia serves them cookies and pours the tea...


And watches them enjoy their snack.


Mama goes for a ride on the swing. There are two sets of little hands eager to push her...


The family of faeries cuddle on the bench by the pond...


Mama is tired, and takes a nap.


Papa takes baby to sit on the bridge and watch the stream pass by.


Then baby goes for a ride in the wagon.


Baby snug in her comfy bassinet, Mama and Papa enjoy the fire...


When play is done, Kaia carefully replants all the veggies.


I hope you enjoyed our garden tour! This garden sees so much play, a magical world of Kaia's very own. Thank you so much to The Magic Onions for inspiring us to create a faerie garden, and for hosting such an awesome competition. It has been such a lovely journey for my daughter and I, and a wonderful time creating together.

You can see where our faerie garden started here.

You can find a (possibly slightly overwhelming) tutorial on our faerie house here.

You will find the tutorial for our broom here.

You can see close-ups of, and the pieces used to create, all the furniture here.

The tutorial for our tiny faerie well is here.

The tutorial for making the bendy doll faeries we made is here.

There are close-ups of all the little clay things I made for it, (including a number not in this post,) here.

And finally, pictures and processes of our faerie garden, the rope ladder, a brief tutorial on the making of the baby bassinet, a semi-tutorial on the making of the swing, and the addition of a few other structures can all be found here.  

Also, do not forget to visit The Magic Onions and check out all the wonderful faerie gardens entered in the contest!